What is new in this version
- A pressure reading. A plumber measured about 21 pounds per square inch at your home. It is the first real number we have, and it changes how we read the state rules for parks.
- How far the problem reaches. You have told us it affects your whole street and at least one home in the middle of the park. That points at the park's supply.
- Where the equipment goes. You have told us it may have to sit at the back of the home. That affects the pipe run and the labour, and we have a question about it.
- Water quality. It is now part of the plan. We will have the water tested by a laboratory before any treatment is chosen.
- Cost. The materials figures have not changed, but we now say more plainly what they leave out.
What is wrong
People usually call this "low pressure", but there are two different things that can be low, and they need different fixes.
- Pressure is how hard the water pushes. It is what you feel when one tap is open.
- Flow is how much water the pipe can deliver. It is what runs out when the shower and the kitchen tap are both on.
A pump can raise pressure. A pump cannot create water that the supply line does not deliver. If flow is the problem, a pump connected straight to the park's pipe will not fix it.
A plumber has measured about 21 pounds per square inch (psi) at your home. California requires newly built water systems to deliver at least 40. This is the first measurement we have, and it is a pressure reading only: flow has not been measured yet. Our first step is still to measure both, where the park's pipe meets your lot, at the busiest time of day.
You have told us that every home on your street is affected, and at least one home in the middle of the park. That points at the park's supply rather than at anything inside your home.
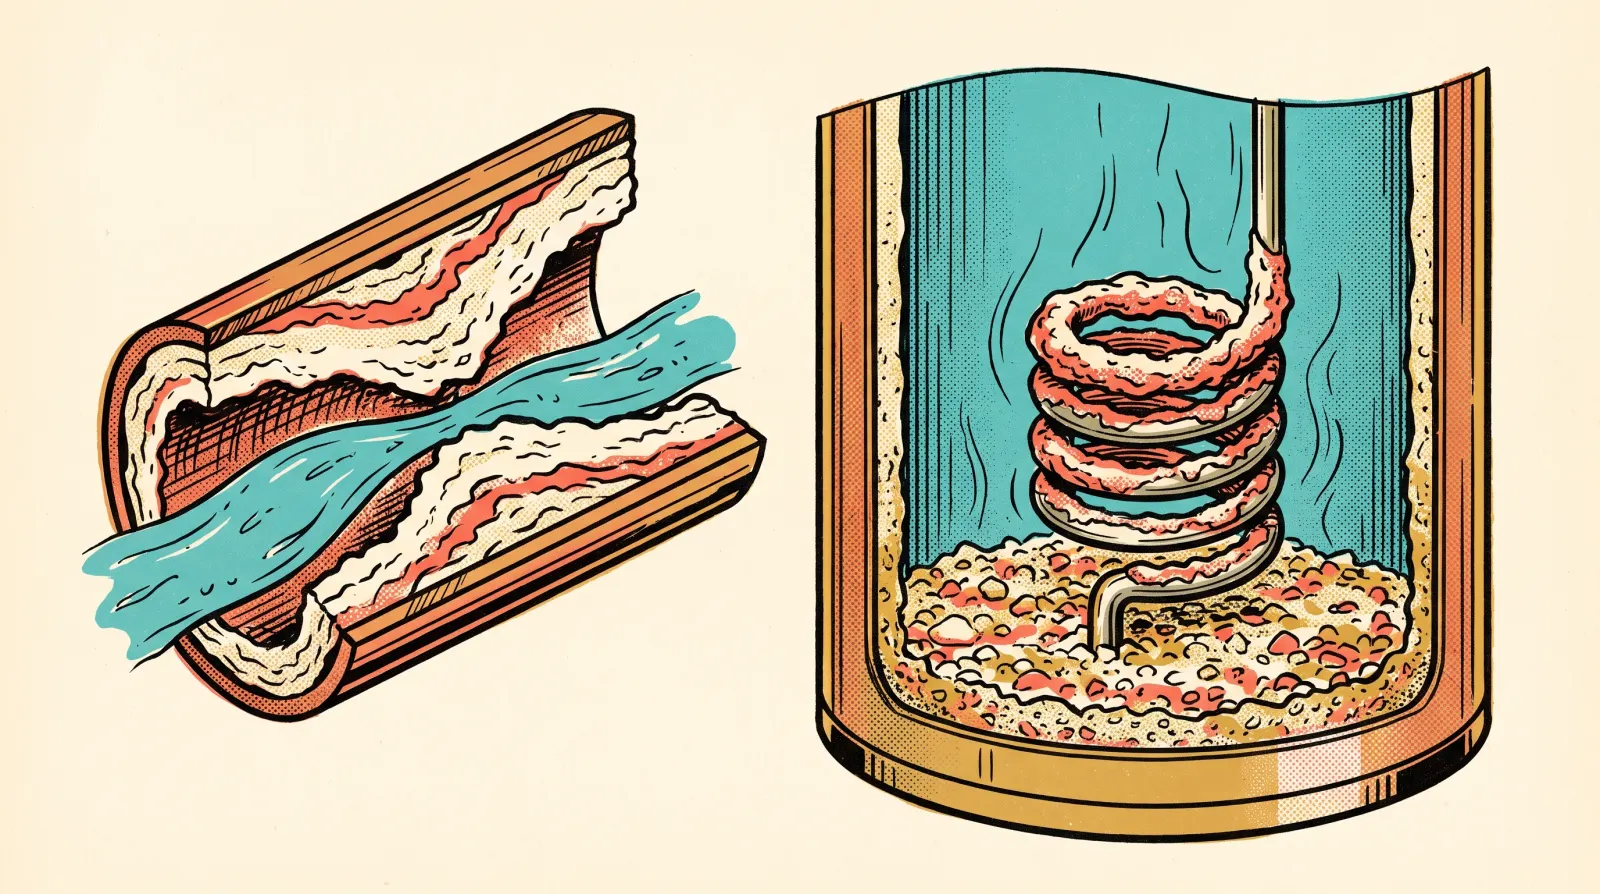
Hard water can add to the problem by leaving scale inside pipes and the water heater. Two quick checks will show whether it is doing so here: comparing an outside tap with an inside one, and comparing hot with cold at the same tap. We will do both when we measure.
The plan
If the measurements confirm what we expect, the fix is a storage tank with a booster pump.
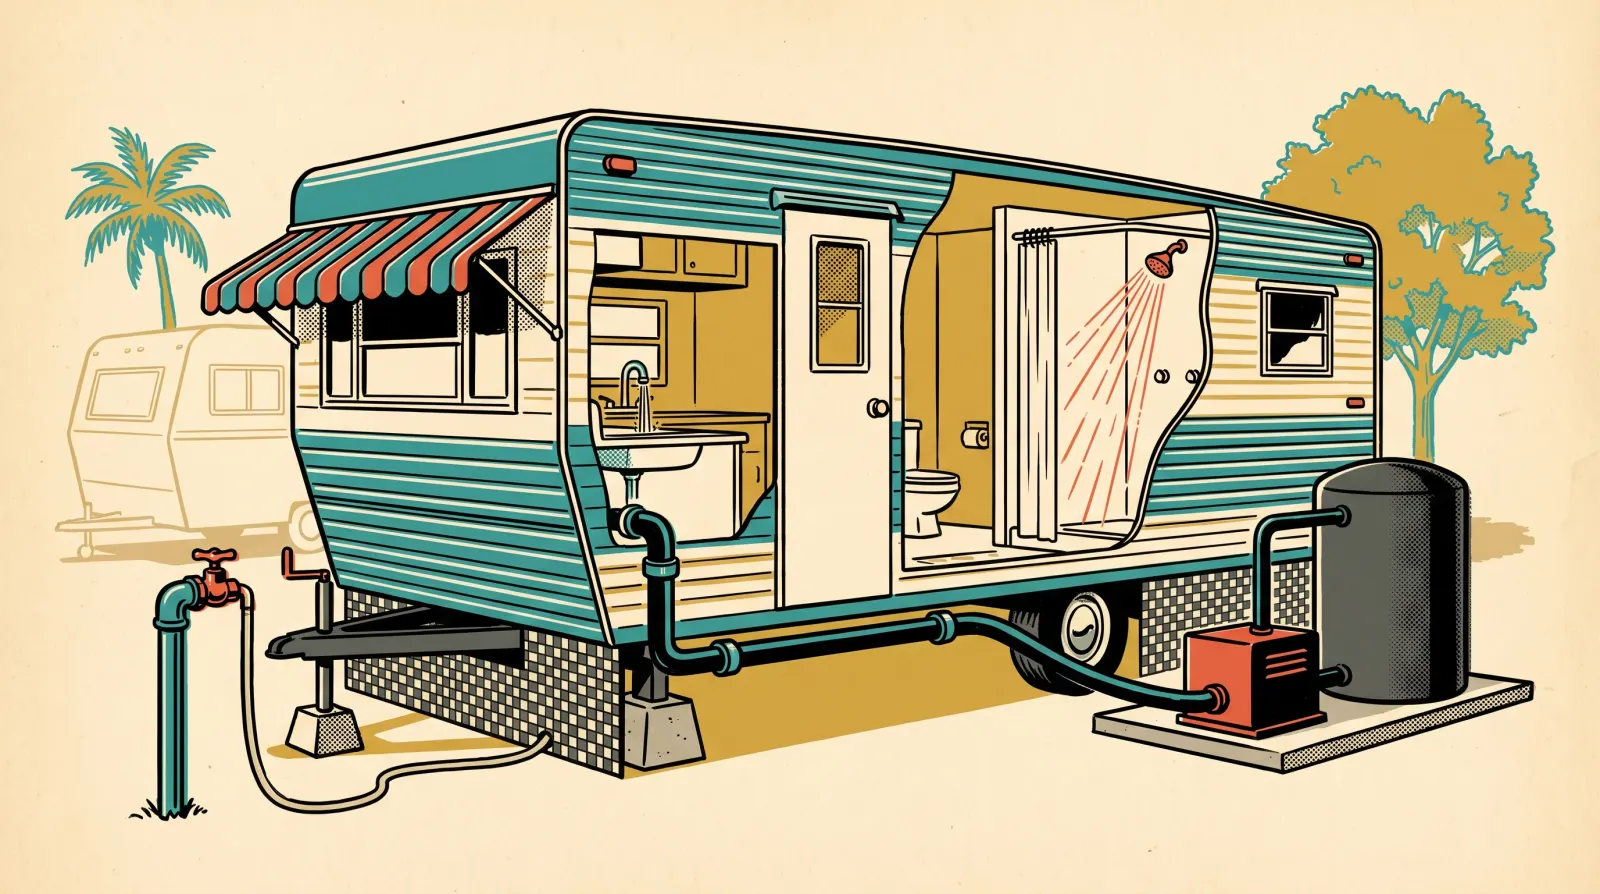
The tank fills slowly from the park's supply, day and night, at whatever rate the supply can manage. A float valve shuts the filling off when the tank is full. When you open a tap, the pump draws from the tank and delivers water to the house at full pressure. The tank is what lets a slow supply meet a fast demand.
A bypass line lets park water reach the house directly, at the park's usual rate, so you still have water if the pump is switched off, needs service, or the power is out.
The tank covers bursts of heavy use. It cannot outrun the supply over a long stretch: several long showers back to back, or laundry and garden watering together, can still draw it down, and it then needs time to refill. Sizing the tank to your household's use is how we keep that rare.
The tank has a second purpose. A pump connected straight to a weak supply pulls on the park's pipe and can lower the pressure for your neighbours, and the park or the water supplier may not allow it. A pump that draws from a tank does not.
Water quality
You have told us the water is very hard, that it is damaging appliances and fixtures, and that you are concerned about what is in it. You use it for washing (dishes, clothes, showers and baths) and do not drink it or cook with it.
Before any equipment is chosen, we will have the water tested by a laboratory. Hardness, taste and safety are three separate things, and each calls for different equipment. An ordinary carbon filter improves taste but does not remove hardness. A softener removes hardness but does not improve taste. And taste alone cannot tell us whether water is safe.
| Hardness | Taste | Safety | |
|---|---|---|---|
| Carbon filter | No | Yes | Depends |
| Softener | Yes | No | Depends |
| Lab test | Measures | No | Shows |
Because the water is for washing and not for drinking, the test is built around what matters when washing: what hot water releases into the air of a shower, what touches the skin, and the little that is swallowed when brushing teeth.
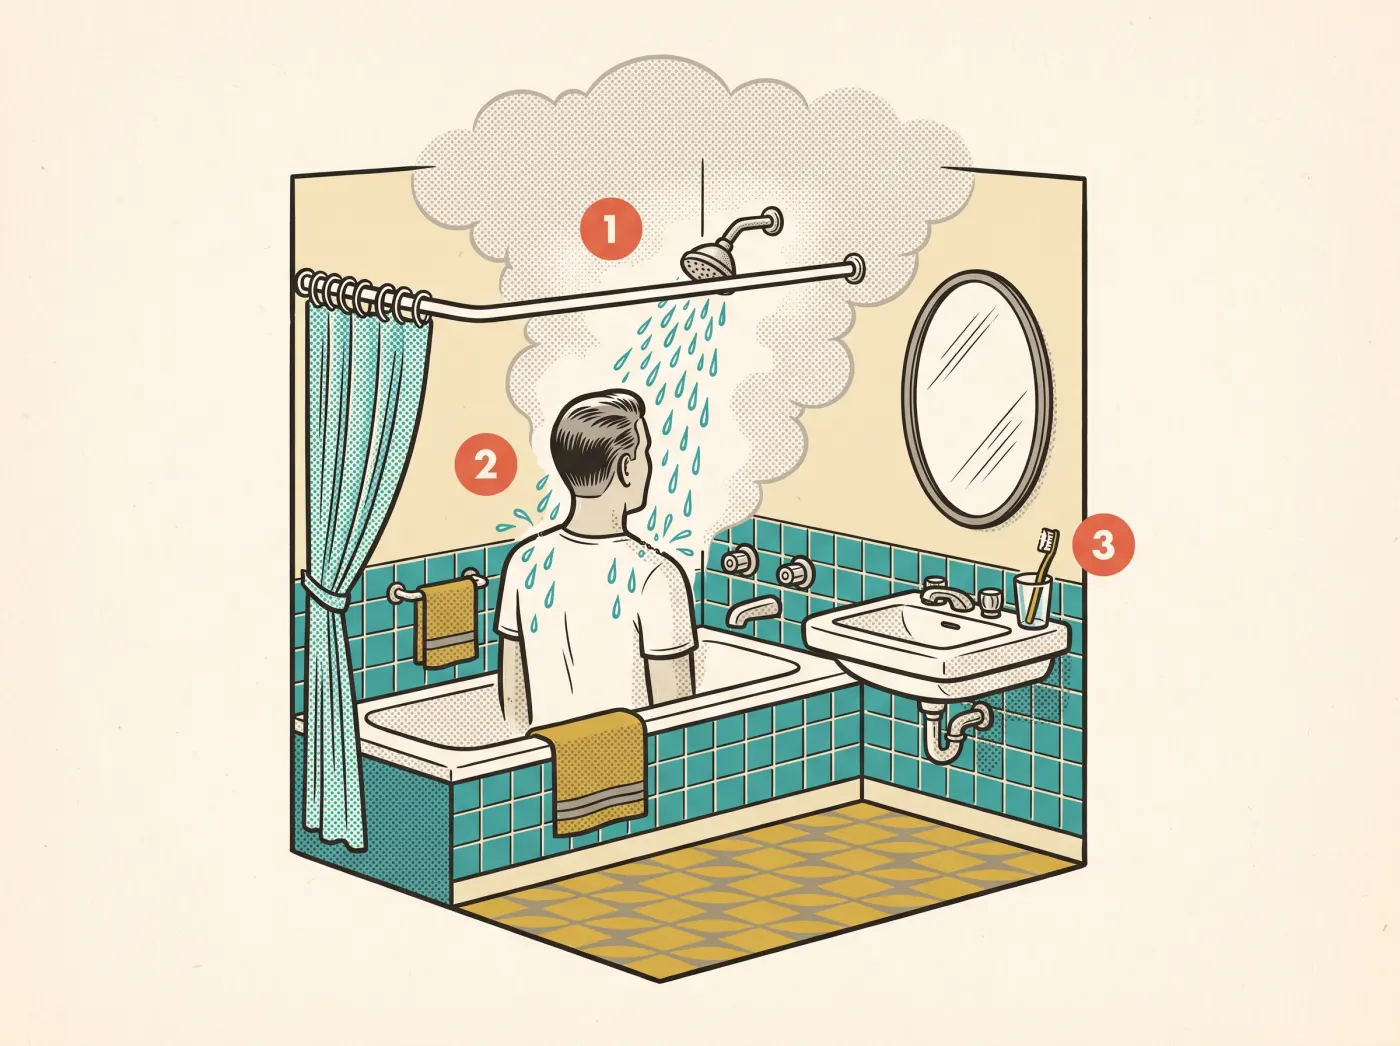
- Breathing. Hot water releases some chemicals into the air of a shower.
- Skin. Some chemicals pass through skin, mainly in long hot baths. Lead does not.
- Swallowing. A little, when brushing teeth.
What the laboratory will test
- For appliances and scale. Hardness, acidity, dissolved minerals, iron, manganese and silica. This shows how much scale the water leaves in the water heater, dishwasher and washing machine, and it sizes a softener if one is wanted.
- For showers and baths. A scan for chemicals that hot water releases into the air, including the by-products that chlorination leaves in water. Bacteria. And chlorine, which we read on the spot. These are what a person breathes in or absorbs in a hot shower or bath.
- For the pipes. Lead and copper, in water that has stood in the pipes overnight. For washing, this mainly shows whether the water is corroding the plumbing: the US Centers for Disease Control states that skin does not absorb lead from water.
- Left out for now. Tests that matter mainly when water is drunk every day, such as nitrate and pesticides. We will add them if the supplier's report or the laboratory gives a reason to.
How it will be done
- Free information first. The water supplier's annual water quality report, and the public records for the park if it runs its own water system. These may shorten the list of tests we pay for.
- Two sampling points. The tap nearest the park's pipe, which shows what the park delivers, and the bathroom tap used for brushing teeth, which shows what your own plumbing adds.
- An accredited laboratory. One accredited by the state, with paperwork that lets you show the result to the park.
- A second test after installation, to show what the new system changed.
- Tap nearest the park's pipe: what the park delivers. The full set of tests.
- Bathroom tap used for brushing teeth: what your own plumbing adds. Lead and copper from the first water of the morning, then bacteria.

What the results decide
The results decide whether water treatment is added to this plan, and what kind. If it is, it goes after the booster pump, because filters and softeners use up pressure that the park's supply does not have to spare. Planning for it now means the pipework is done once. Since the water is not drunk, treatment would be for the whole house, not a separate unit at the kitchen sink.
Brushing teeth is the one way you have told us the water is swallowed. Before the results arrive, we will agree with you what result would mean switching to bottled water for that. Nothing so far says the water is unsafe. If you would rather not wait, switching now costs very little.
- Any E. coli, or coliform bacteria confirmed on a retestBottled water
- Copper above 1.3 milligrams per litre (the federal action level)Bottled water
- Lead above a level we agree with you before the results arriveBottled water
This is a plan for testing the water. It is not a health assessment.
The steps
- Measure and sample. We measure pressure and flow where the park's pipe meets your lot and at a tap indoors, at a busy time of day and a quiet one. We leave a gauge in place for a day or two that records the lowest pressure it sees. On the same visit we take the water samples for the laboratory.
- Check the rules. We find out what the park's rules, the plumbing code and the water supplier allow, and whether any permit is needed.
- Talk to park management. We ask whether the weak supply is a known problem, whether the park will correct it and when, and what may be installed on your lot.
- Confirm the approach. With the measurements and the answers in hand, we confirm that a tank and pump is the right fix, and settle the tank size.
- Specify and order. We choose the tank, the pump and the parts, and order them.
- Install and test. We install the system and raise the pressure in stages, checking for leaks at each one, because your pipes have only ever carried about 21 psi. Then we repeat the measurements from step 1 to show the result.
Steps 1 to 3 can happen at the same time. Nothing expensive is bought until step 4 is done, and if step 1 points to a simpler fix, the plan changes before anything else is spent. The water test carries a laboratory fee, which we will tell you before going ahead.
What we need from you
- Park management. Your agreement that we may contact them about your water supply, or an introduction if you would rather make the first contact yourself. If you know who said the problem affects only half the park, please tell us.
- About the plumber's reading. Where it was taken (an outside tap or inside), roughly what time of day, and whether any water was running at the time. Also whether the pressure has always been like this, or got worse at some point.
- A place for the tank. The tanks we are considering hold between 100 and 300 gallons. A 200-gallon tank is about 30 inches across, and when full it weighs about 1,700 pounds, so it needs a firm, level base. We will agree the spot with you once the size is known.
- Why the back of the home. You have told us another company said the equipment must sit at the back, while the water comes in at the front. It would help to know the reason, because park rules, space and appearance each lead to a different answer. If it does have to be the back, the pipe that fills the tank can be small, because the tank fills slowly, and the pipes may be able to run along the outside of the home instead of underneath. We will look at both routes.
- A morning for water samples. One sample has to be the first water out of the bathroom tap after it has stood overnight, so we will ask you not to run that tap before we arrive.
- Electricity for the pump. The pumps we are considering plug into a standard 115-volt outlet. The manufacturers recommend a dedicated 20-amp circuit, so we will need to look at what is available near where the pump will sit.
- Access for measuring. A visit at a busy time of day and another at a quiet time.
The equipment
Storage tank. A closed tank made for storing drinking water, dark-coloured so that algae cannot grow in it. Its size depends on how fast the park's supply can fill it and how much water your household uses in a day, which is why we measure first.
Booster pump. A compact electric pump that starts when you open a tap and stops when you close it. We are comparing three models. They are specified to shut themselves off if the tank runs empty. Two of them are noticeably quieter than the third, according to the makers' and sellers' figures.
Fittings and valves. A float valve for the tank, shut-off valves so the pump can be serviced, the bypass line, a pressure gauge, and the pipe to connect it all. Depending on your water heater, a small expansion tank may also be needed.
Estimated materials cost
This is our estimate for materials only. We expect about $2,350, and the total could fall anywhere between about $1,750 and $3,600 depending mainly on the size of the tank and the choice of pump. Your total cost will be higher once labour, sales tax and any permit fees are added. It also leaves out the laboratory's fee and any water treatment equipment.
| Item | Low | Expected | High |
|---|---|---|---|
| Measuring tools | $15 | $45 | $45 |
| Storage tank, including delivery | $390 | $650 | $1,100 |
| Booster pump | $1,160 | $1,160 | $1,550 |
| Float valve, fittings, valves and pipe * | $125 | $205 | $290 |
| Electrical parts and expansion tank * | $0 | $135 | $220 |
| Tank base and weather protection * | $50 | $150 | $400 |
| Total (rounded) | $1,750 | $2,350 | $3,600 |
- Prices for the pump, the tank and the float valve were checked with retailers on 4 October 2026. Prices change.
- Lines marked * are rough figures that we have not yet priced item by item.
- Not included: labour, sales tax, any permit fees, an electrician's work if a new circuit is needed, the laboratory's fee for the water test, and any water treatment equipment.
- Labour is not a small item. If the equipment sits at the back of the home, running pipe from the front to the back is a large part of the work. We will give you a labour figure once the route is settled.
- The figure for pipe and fittings assumed a short run. It will rise if the equipment sits at the back.
- The figures will be revised once the measurements settle the tank size.
- Labour
- Sales tax
- Permit fees
- Electrician, if a new circuit is needed
- Laboratory fee
- Water treatment equipment
What could change
- The measurements. If they show good pressure at the park's pipe and a restriction on your home's side, such as a failing pressure regulator, a clogged filter or a partly closed valve, the fix could be much simpler and cheaper than a tank and pump.
- The park's answer. The park may already know about the problem, may be willing to correct it, or may have rules about what can be installed on a lot.
- Permits. We do not yet know whether a permit is needed for the plumbing or the electrical work.
- Backflow protection. The park or the water supplier may require a device that stops water flowing back into the park's pipes. We will ask, and add it to the plan if so.
- The water test. Its results decide whether water treatment is added to the plan, and what kind.
- State rules for parks. California sets a minimum water pressure that a mobile home park's water system must maintain at each lot at the busiest time of day: 20 pounds per square inch, or 15 for parks built between 1979 and 2004. The 40 you mentioned is California's figure for newly built water systems; for existing ones it is 20. If your park is in California, the plumber's 21 is right at that line. If it was taken with nothing running, the pressure will be lower at the busiest hour, so that is the reading that counts, and we will take it. If it falls short of the park's figure, correcting the supply is the park's responsibility, and with your neighbours affected too it is worth raising together, before you spend money on equipment. But 20 is a low bar. A park can meet it and a home still have too little pressure, so we expect a booster to be part of the answer either way. This is our reading of the rules, not legal advice.